Creating custom tasks in VSCode
2023/03/30What are tasks?
VSCode makes developing and maintaining a codebase super easy with thousands of installable extensions and features to enhance the user experience. Running commands is something everyone does, wether it be to run a set of unit tests, execute a build process or push some code to GitHub with specific flags to start a workflow cycle.
You can create tasks to run scripts and start processes from within VSCode without having to enter any commands, and I'm going to show you how easy it actually is.
How do I create and run a task?
If you've VSCode for a while you should have noticed that files related with VSCode are stored in a .vscode folder in the root of your current directory, this is no different for tasks. Once you've opened a directory in your workspace, then check for the vscode folder or create one if it doesn't exist. You can then create a tasks.json file within the folder using echo {}> .vscode/prettierrc.json. The file should look something like this:
{}
Open up the file and paste the following into the file:
{
  "version": "2.0.0",
  "tasks": [
    {
      "label": "Hello world",
      "type": "shell",
      "command": "echo Hello World",
      "problemMatcher": []
    }
  ]
}
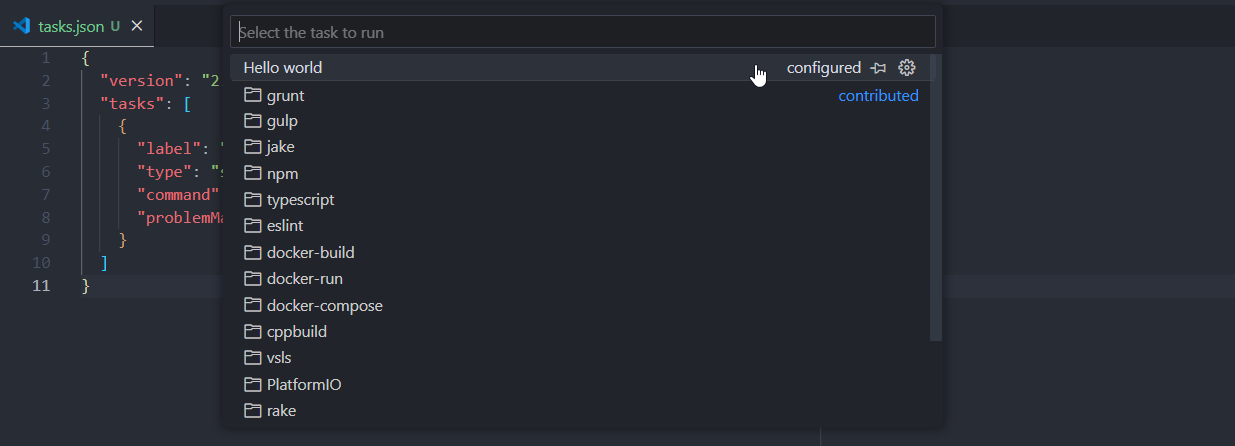
After saving the file you can run the task in two ways:
- Press
F6and select the "Hello world" task
- Use the command pallet by pressing ctrl+shift+P and searching for "Tasks: run task"
A new integrated terminal should be created in which "Hello World" should be printed. Congratulations on creating and running your first task!
Now, let's go through the task and understand what the different options mean.
- label: This refers to the label which you see when you search for a task to run
- type: This has to be either "shell" or "process", if the type is "shell" then the command is interpreted as a shell command, otherwise the command is interpreted as a process to execute. Here's a SO thread for more information
- command: The command to execute
- problemMatcher: VSCode can scan the output of a task with a problem matcher to check if there were any errors in executing the task, and report them if they occurred.
There are a huge amount of other options available, you can read more about them here.
Running multiple tasks in sequence
Poetry is a great tool to keep track of dependencies in a Python project as well as packaging and building your own Python project for distribution. Our end goal for this task is to run both the poetry build and poetry publish commands in sequence, while also being able to run poetry build on it's own.
To start we can create a new shell task to run poetry build:
{
  "label": "Poetry build",
  "type": "shell",
  "command": "poetry build",
  "problemMatcher": []
}
We'll also create a task to run poetry publish:
{
  "label": "Poetry publish",
  "type": "shell",
  "command": "poetry publish",
  "problemMatcher": [],
  "dependsOrder": "sequence",
  "dependsOn": ["Poetry build"]
}
But notice how there are two extra options for this task; dependsOrder and dependsOn. dependsOn is a list of different task labels which the current task depends on, by default when you run the task then all the tasks in the list will also run in parallel. However, by using the dependsOrder option we can specify that we want the tasks to run in sequence. This results in the "Poetry build" task running before "Poetry publish" runs when we try and run the "Poetry publish" task in VSCode.
Getting user input
Let's say we wanted to create a task which would automatically format our Python files and push to git once we run the task, how would we go about doing that? These are the steps required:
- Format our Python files
- Ask for a git commit message
- Push to git
We can start of by creating a task to format our files using Black and a task to commit and push to git:
{
  "label": "Black format",
  "type": "shell",
  "command": "black .",
  "problemMatcher": []
},
{
  "label": "Git add",
  "type": "shell",
  "command": "git add .",
  "problemMatcher": []
},
{
  "label": "Git commit",
  "type": "shell",
  "command": "git commit -m ''",
  "problemMatcher": []
},
{
  "label": "Git push",
  "type": "shell",
  "command": "git push",
  "problemMatcher": [],
  "dependsOrder": "sequence",
  "dependsOn": ["Black format", "Git add", "Git commit"]
}
But notice how we'll be committing with an empty commit message each time, which isn't something we want, instead we want to ask for a commit message from the user. To do this we can create a new list called inputs in the main section of our tasks.json file:
{
  "version": "2.0.0",
  "tasks": [
    ...
  ],
  "inputs": [
}
Inside this inputs list we will define different user inputs which we can then use in our tasks, let's place the following input config into the list:
{
  "type": "promptString",
  "id": "gitCommitMsg",
  "description": "Enter a commit message"
}
Here we define the type of the input to be one of three types, in this case it's asking for a string input. We then also assign a unique ID to this input so we can use it in our tasks, and finally we give it a description message.
Now, going back to our "Git commit" task, let's swap out the command to use our custom input:
{
  "label": "Git commit",
  "type": "shell",
  "command": "git commit -m ${input:gitCommitMsg}",
  "problemMatcher": []
}
When we run our task, first all of our files will be formatted using Black and staged, then we will be prompted for a commit message before all our files will be committed and pushed.
Conclusion
So that was a super quick and simple guide to creating custom tasks in VSCode to hopefully help and increase your productivity. Make sure to check out the official docs for more information and options such as creating problem matchers, making operating system specific tasks as well as executing background tasks.
Thank you for reading! 💖